In our continuing adventures of putting the highly versatile Apple MacMini to work in all sorts of applications:
A customer of ours has a specialized application that is extremely low bandwidth, but needs to be able to be accessed through a VPN connection to a protected network resource. All the usual suspects for providing this kind of service (Netscreen/SSG, Netopia) all have artificial limits on the number of concurrent VPN connections. In order to service the number of concurrent users (anywhere from 1 to 200), the customer would be looking at least $5,000 for a capable device. Again, this system is very low bandwidth, so these kinds of devices would be serious overkill.
In comes the MacMini running Tiger Server with the built-in VPN service.
However… the MacMini has always had a single weak spot: the hard drive. Even with a very low disk based usage that a dedicated VPN Server would entail that vulnerability to a disk failure has always bothered me and I wanted this VPN server to be on par in terms of reliability as much as possible compared to a hardware device. Even the MacMinis that we build out for customers in a load balanced environment, we always replace with a extended use rated drive, as the extra $100 is a nominal expenditure compared to the time that would be involved in dealing with a failed system.
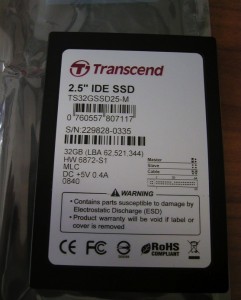
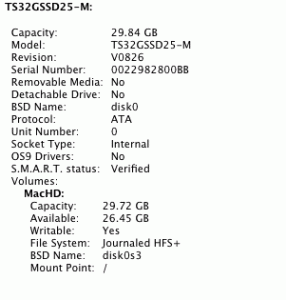
In comes the Solid State Disk. A 32GB SSD with a IDE interface runs just under $100. For a system running primarily as a VPN Server, this is PLENTY of space as the only real ongoing writes will be log files. I chose a MLC (Multi-Level Cell) device over a SLC (Single Level Cell) based device as the differences in speed and longevity between the two variations of SSD just were not a factor in this application. A MLC SSD already has a useful lifetime/MTBF an order of magnitude greater than a standard Winchester based disk with it’s moving parts.
In the end I used a 1.33Ghz G4 (PowerPC, not Intel) MacMini with 1GB of RAM, as that CPU should be able to easily handle the tasks of handling a couple hundred concurrent VPN connections using 1-2Kbits/sec each. Again, VERY low bandwidth application.
I took the MacMini with it’s original 40GB Seagate drive and installed Tiger Server so I could get it updated and setup while I waited for the SSD to arrive from the online vendor. When I was ready to install the SSD, I used Disk Utility to save the installed system to a disk image. Installing the SSD was straightforward and not any different that replacing the internal drive on a MacMini. I then booted from CD, formatted the new SSD device and then performed a Restore operation of the installed Tiger Server onto the new SSD.
One thing that was very interesting to watch… SSDs perform their best with you throw a large amount of sequential reads/writes at them. When doing a Restore with Disk Utility it’s best to use the “Erase Destination” option as that will enable the imaging system the best opportunity to use a Block level Restore, instead of a File based Restore. A Block level Restore streams data at the disk and the SSD just ate this up. I Restored the 3.2GB installed System image in about 3 minutes. This is about 3 times faster than restoring back to the 40GB Seagate (I went back and tried it for comparison)
As always, when deploying a new type of setup we test the power utilization and found that 1) the G4 MacMini uses a ridiculously low amount of Amps; 2) the SSD didn’t really save much power usage.
Some anecdotes from my ammeter (we use 120V here in the States):
| 40GB Seagate |
32GB SSD | |
| Max CPU/Disk | 0.25A | 0.24A |
| Cold Start spike | 0.26A | 0.25A |
| Idle | 0.13A | 0.12A |
Adding a USB Ethernet Adapter increased all values by about 0.06A
This is necessary for the backside network resource routing.
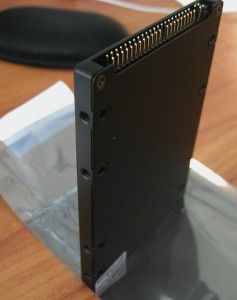
Some pictures
And of course the obligatory speed of boot/login videos:
We have several more G4 MacMinis and are looking for appropriate applications to utilize them especially with an ultra-reliable drive installed.


